


 Decking Screws
 Drilling Screws


How to choose wood screws for wood projects
Choosing wood screws for wood projects requires careful attention to screw type, size, material, and features. The right selection impacts strength, durability, and appearance. Many woodworkers face frustrations such as wood splitting, stripped screws, and alignment issues. Professionals often match screws to wood type and application, ensuring reliable results.
Evidence Description
Impact on Strength and Durability
Coarse threads offer roughly 18% more resistance when pulled out from softwood compared to fine threads.
Increased holding power in softwood applications.
Project Requirements for Woodworking Screws
Wood Type Considerations
Selecting the right wood screws for wood projects starts with understanding the wood itself. Hardwoods and softwoods have different densities and grain structures, which affect screw performance. The table below summarizes key factors:
|
Factor |
Hardwoods |
Softwoods |
|---|---|---|
|
Screw Size |
Varies by project |
Varies by project |
|
Length |
Based on wood thickness |
Based on wood thickness |
|
Thread Type |
Fine threads prevent splitting |
Coarse threads for secure grip |
|
Head Style |
Function and aesthetics matter |
Function and aesthetics matter |
|
Pre-drilling |
Recommended to avoid splitting |
Less critical but still helpful |
Pre-drilling pilot holes is especially important in hardwoods. It helps prevent splitting and ensures accurate screw placement, especially for larger screws.
Indoor vs. Outdoor Use
Environmental conditions play a major role in screw selection. For outdoor projects, wood often contains higher moisture levels—typically between 9% and 14%. When moisture exceeds 14%, screws can corrode, and wood may weaken or develop fungal growth. Outdoor wood screws should have corrosion-resistant coatings or be made from stainless steel to withstand these challenges.
Load and Structural Needs
Project load requirements determine screw length and thickness. Heavier loads demand longer and thicker screws for secure joints. The table below outlines common recommendations:
|
Project Type |
Recommended Length |
Base Material Thickness |
|---|---|---|
|
1¼" |
½"–¾" MDF/Plywood |
|
|
Deck Board Fastening |
3" |
1¼" Pressure-Treated |
|
Heavy-Duty Framing |
3½"+ |
2x Laminated Beams |
Mistakes such as choosing the wrong screw type or size can lead to weak connections or even project failure. Always match screw specifications to the load and environment for best results.
Screw Types & Materials for Wood Projects
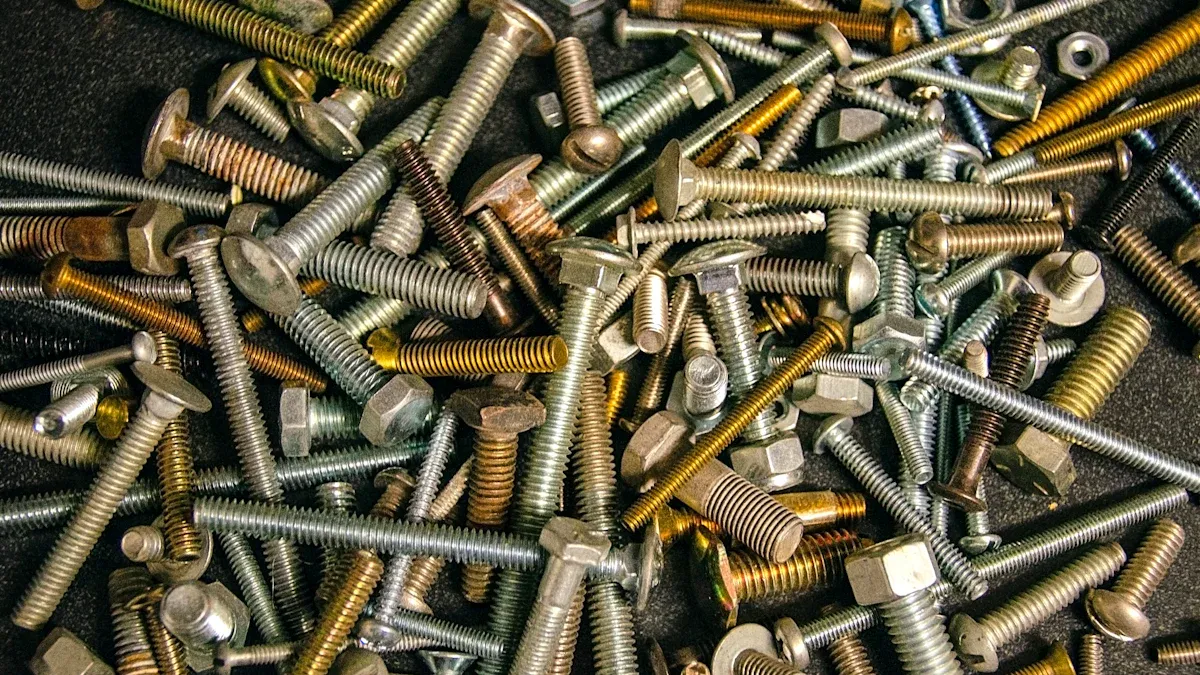
Common Woodworking Screws
Choosing the right screw fasteners for your project starts with understanding the different types of woodworking screws and their uses. Each type offers unique benefits for specific applications. The table below highlights some of the most common woodworking screws and their typical uses:
|
Screw Type |
Application Description |
|---|---|
|
Pocket Hole Screws |
Used for assembling frames and casework. |
|
Decorative Screws |
Feature finishes that match the project for aesthetic purposes. |
|
Drawer Front Screws |
Allow for adjustment of false drawer fronts. |
|
Flat Head Screws |
Designed to sit flush with the surface, often used in various woodworking projects. |
|
Pan Head Screws |
Provide more holding power and resistance to racking. |
|
Truss Head Screws |
Suitable for sliding in slots for adjustments. |
|
Washer Head Screws |
Offer a flat bearing surface, ideal for adjustment slots. |
|
Round Head Screws |
Used for decorative purposes with a prominent half-dome head. |
|
Trim Head Screws |
Feature a small head that can be sunk below the surface, often used in trim carpentry. |
A practical example is the Fuertes Crew Black Phosphate Drywall Screws for Wooden Studding. These screws feature a coarse thread for strong grip in wood, a bugle head that sits flush for easy finishing, and a sharp point for quick installation. They work well for attaching drywall to wooden studs, but also perform reliably in other wood projects where a secure hold and clean finish are important.
Material Choices
The material of your wood screws affects strength, corrosion resistance, and cost. Selecting the right material ensures your project lasts and looks good over time. The table below compares common screw materials:
|
Material |
Corrosion Resistance |
Strength & Durability |
Cost |
Suitability |
|---|---|---|---|---|
|
Stainless Steel |
Exceptional |
Excellent |
Higher |
Outdoor, marine, heavy-duty |
|
Carbon Steel |
Moderate |
Good |
Low |
Indoor, structural, coated required |
|
Brass |
Limited |
Fair |
Medium |
Indoor, decorative, electrical |
|
Plastic |
Good |
Low |
Low |
Light-duty, chemical environments |
-
Steel screws offer strength and affordability, making them a popular choice for most indoor woodworking projects. However, they may rust if exposed to moisture.
-
Stainless steel screws provide excellent corrosion resistance and durability, making them ideal for outdoor, marine, or heavy-duty applications.
-
Brass screws look attractive and resist corrosion, but they are best for decorative or electrical uses due to lower strength.
-
Coated screws, such as those with black phosphate or zinc finishes, enhance durability and lifespan, especially in damp or outdoor environments.
Matching Screws to Project Environment
Selecting the right screw material for your project environment prevents premature failure and ensures long-term performance. Consider these tips:
-
Use stainless steel or coated screws for outdoor decks, fences, or garden structures where moisture is present.
-
In kitchens and bathrooms, where humidity is high, zinc-coated or other corrosion-resistant fasteners help prevent rust and maintain joint strength.
-
For indoor furniture or cabinetry, carbon steel or brass screws work well, especially when appearance matters.
-
When working with composite materials, predrilling screw holes can prevent splitting and improve holding power.
Tip: Always match the screw material and coating to the wood treatment and environment. This practice extends the life of your wood screws for wood projects and keeps your work looking professional.
Sizing Wood Screws for Wood Projects
Length and Gauge Basics
Selecting the correct screw size is essential for achieving strong, reliable joints in woodworking. Screw length and gauge determine how well the fastener holds the materials together. The gauge refers to the diameter of the screw, while length measures how deep the screw penetrates the wood.
The following table summarizes popular screw sizes for common woodworking applications:
|
Screw Size |
Major Diameter (in) |
Pilot Hole — Hardwood |
Pilot Hole — Softwood |
Countersink Diameter |
Typical Use |
|---|---|---|---|---|---|
|
#4 |
0.112 |
7/64″ |
3/32″ |
1/4″ |
Hinges, small hardware |
|
#6 |
0.138 |
9/64″ |
1/8″ |
5/16″ |
Light cabinet joinery |
|
#8 |
0.164 |
11/64″ |
5/32″ |
3/8″ |
General woodworking |
|
#10 |
0.190 |
13/64″ |
3/16″ |
7/16″ |
Furniture, pocket holes |
|
#12 |
0.216 |
7/32″ |
13/64″ |
7/16″ |
Heavy casework, structural |
|
#14 |
0.242 |
1/4″ |
15/64″ |
1/2″ |
Decking, construction |
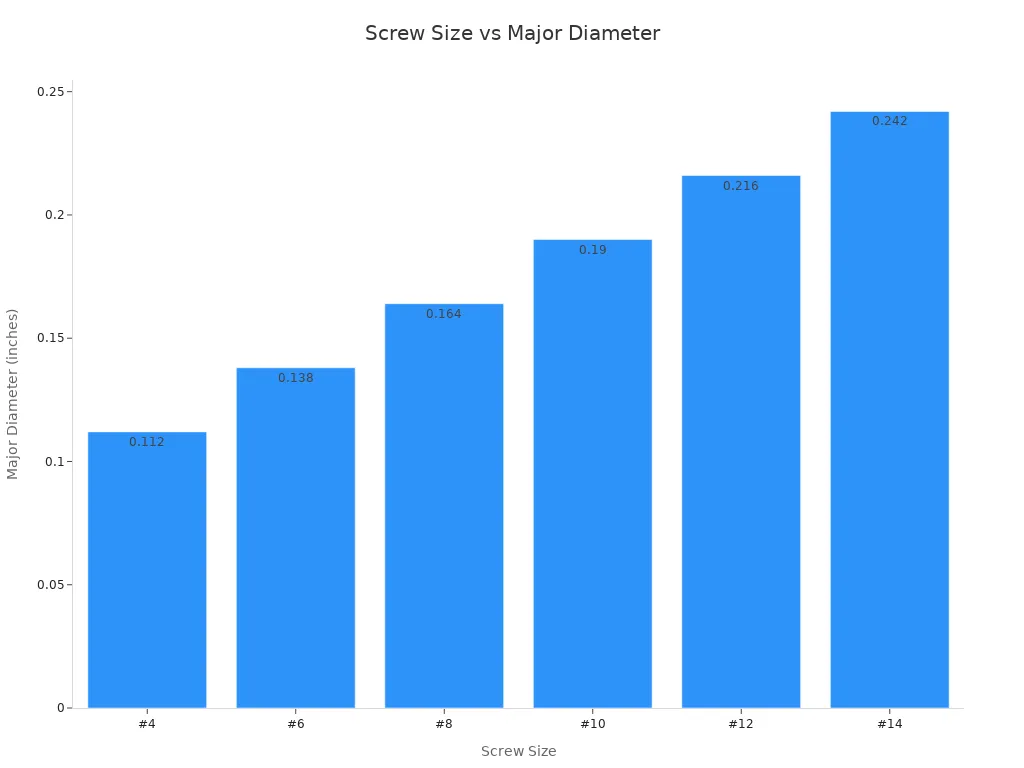
Wood screws are available in a range of gauges and lengths. The table below shows typical available lengths for each gauge:
|
Gauge |
Head-Bore Size |
Shank-Hole Size |
Hardwood Pilot-Hole Size |
Softwood Pilot-Hole Size |
Typical Available Lengths |
|---|---|---|---|---|---|
|
4 Gauge |
15/64 |
7/64 |
5/64 |
1/16 |
3/8 to 3/4 |
|
5 Gauge |
1/4 |
1/8 |
5/64 |
1/16 |
3/8 to 3/4 |
|
6 Gauge |
9/32 |
9/64 |
3/32 |
5/64 |
3/8 to 1 1/2 |
|
7 Gauge |
5/16 |
5/32 |
7/64 |
3/32 |
3/8 to 1 1/2 |
|
8 Gauge |
11/32 |
5/32 |
7/64 |
3/32 |
1/2 to 2 |
Tip: For most general woodworking, #8 screws offer a balance of strength and ease of installation.
Sizing for Strength and Fit
Proper sizing ensures that wood screws provide maximum holding power without damaging the material. Longer screws reach deeper into the wood, increasing joint strength. Thicker gauges support heavier loads and resist shear forces.
-
Longer screws provide a deeper reach into the wood, enhancing holding strength.
-
The gauge affects the screw's diameter and load capacity; thicker screws generally offer more strength.
-
The ideal screw length should be at least twice the thickness of the material being fastened.
When selecting screw size, consider the thickness of both the top and bottom layers. The screw should be the length of the top attachment plus two-thirds of the bottom layer depth. If thickness is limited, use at least the full length of the attachment plus half of the bottom’s depth.
Note: Coarse threads deliver better grip and pull-out strength in softwoods. Fine threads are preferable for hardwoods due to their density.
Preventing Splitting and Weak Joints
Splitting and weak joints are common frustrations in woodworking. These issues often result from improper screw size or installation technique. Best practices help prevent these problems and ensure durable connections.
-
Pre-drill pilot holes to prevent wood splitting and ensure proper screw alignment.
-
Select the appropriate screw size and type based on the material being used.
-
Use coarse threaded screws for softwoods and fine threaded screws for hardwoods to enhance grip and reduce splitting.
Pilot holes are especially important when working with hardwoods or larger screws. They guide the screw, reduce stress on the wood, and minimize the risk of splitting. Always match the screw size to the material and application for optimal results.
Callout: Choosing the right wood screws for wood projects means balancing screw length, gauge, and thread type to maximize strength and minimize damage.
Head and Drive Types for Wood Screws
Head Shapes
Wood screws feature several head shapes, each designed for specific applications and benefits. Selecting the right head shape improves both the structural integrity and the finish of your project.
|
Screw Head Type |
Applications and Benefits |
|---|---|
|
Flat Head |
Suitable for countersinking, often used in carpentry and building. |
|
Oval Head |
Ideal for decorative applications like trim and molding. |
|
Round Head |
Suitable for attaching hardware to wood, such as hinges and locks. |
|
Pan Head |
Used in metal hardware and for joining thin pieces of wood. |
|
Trim Head |
Perfect for applications requiring a clean finish, like cabinet making. |
|
Truss Head |
Ideal for applications needing a large bearing surface, reducing material damage. |
|
Washer Head |
Distributes load effectively, suitable for wall hangings and mounting brackets. |
Flat heads create a flush finish, making them ideal for visible joints. Trim heads are less noticeable and work well for delicate wood parts. Truss heads provide a larger contact area, which helps prevent damage when mounting hardware.
Drive Types
Drive types determine how the screw interacts with tools and affect installation efficiency. The most common drive types include slotted, Phillips, and square.
|
Drive Type |
Strengths & Benefits |
Negatives |
|---|---|---|
|
Slotted |
Simple design; widely available; cost-effective |
High risk of cam-out; not ideal for power tools; can damage surfaces |
|
Phillips |
Reduces slippage; works well with power tools |
Prone to cam-out under high torque; not suitable for heavy industrial fastening |
|
Square |
Very low cam-out; excellent for power driving |
Less common in the U.S.; requires special drivers |
Phillips screws reduce slippage and work well with electric screwdrivers. Square drives, also known as Robertson, offer excellent resistance to cam-out and provide secure torque transfer.
Appearance vs. Ease of Use
Choosing between head shape and drive type influences both the look and usability of your finished project.
-
Slotted drives offer a traditional appearance and universal accessibility.
-
Phillips drives center the tool and reduce slippage, making installation easier.
-
Square drives provide superior resistance to cam-out and are efficient for power tools.
-
Hex and star (Torx) drives allow for high torque applications and minimize slippage.
-
Trim and flat heads deliver a clean, professional finish, especially in cabinetry and visible joinery.
Tip: Select screw heads and drive types that match both the functional needs and the desired appearance of your woodworking project.
Thread and Point Design in Woodworking Screws
Coarse vs. Fine Threads
Choosing the right thread type is essential for woodworking success. The thread design affects how well a screw grips the material and resists pull-out.
-
Coarse-threaded screws work best in softwoods, plywood, and composite materials. Their larger gaps allow for a strong grip in these softer materials.
-
Fine-threaded screws are ideal for hardwoods like oak and maple. The tighter spacing helps prevent splitting and ensures a secure hold.
-
For engineered woods such as plywood, screws with aggressive threading provide optimal holding power.
Selecting the correct thread type prevents stripping and improves the overall strength of the joint.
Thread Length and Holding Power
Thread length plays a major role in the holding power of a wood screw. A longer threaded section increases the contact area with the wood, which boosts resistance to pull-out forces. For most woodworking projects, the threaded portion should extend well into the base material. This ensures the screw can support weight and resist loosening over time. When working with softwoods, a longer thread helps distribute force and reduces the risk of material failure. In hardwoods, a properly sized thread prevents crushing fibers and maintains joint integrity.
Point Types for Easy Installation
The point design of a screw determines how easily it penetrates wood. In softwoods like pine, cedar, and spruce, coarse-threaded screws with sharp points bite quickly and require less torque. Using a countersink bit can help maintain pull-through resistance. For hardwoods such as oak and maple, drive types like Torx or Pozidriv are recommended. These designs maintain tool engagement at higher torque levels, reducing the risk of stripping. Sharp, rough-textured stainless steel screws handle significant twisting force in dense woods. Choosing the right point and thread combination ensures smooth installation and long-lasting results.
Corrosion Resistance & Coatings for Wood Screws
Coated vs. Stainless Screws
Selecting the right corrosion protection is essential for long-lasting wood projects. Coated screws and stainless steel screws offer different levels of resistance to rust and environmental damage. The table below compares common coatings and stainless grades by their performance in salt spray tests, which simulate harsh conditions:
|
Coating Type |
Salt Spray Hours (ASTM B117) |
Best Use |
|---|---|---|
|
Black Phosphate |
12–24 hrs |
Indoor only |
|
Clear Zinc (Electro) |
72–120 hrs |
Indoor / covered outdoor |
|
Yellow Zinc Dichromate |
120–200 hrs |
Semi-exposed outdoor |
|
Hot-Dip Galvanized |
500–1,000 hrs |
Outdoor / ground contact |
|
Ceramic / Bronze |
1,000+ hrs |
Decking / ACQ-treated lumber |
|
304 Stainless Steel |
1,500+ hrs |
Marine / coastal / food-grade |
|
316 Stainless Steel |
2,000+ hrs |
Saltwater / chemical exposure |
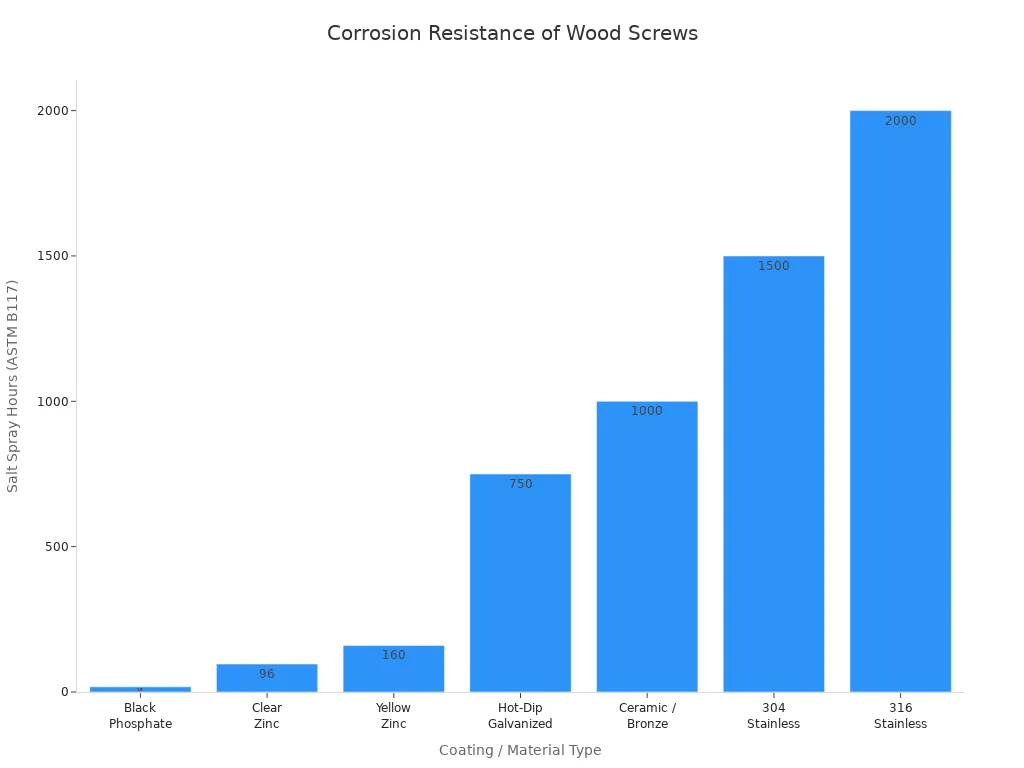
Protecting Against Rust
Different coatings provide varying degrees of rust protection. Choosing the right finish helps prevent staining and extends the life of your fasteners:
-
Black phosphate coating reduces rust stains on wood but is best for dry, indoor environments.
-
Zinc plating offers basic corrosion resistance but may develop white rust if exposed to moisture.
-
Yellow zinc provides better protection than standard zinc, making it suitable for semi-exposed areas.
-
Advanced coatings, such as ceramic or exterior bronze, deliver superior performance for outdoor use and treated lumber.
Tip: For interior projects, black phosphate-coated screws like those from Fuertes Crew offer reliable performance and a clean finish.
Matching Coatings to Wood Treatments
Pressure-treated and chemically treated woods require special attention when selecting fasteners. The chemicals in these woods can accelerate corrosion if the wrong screw is used. Follow these best practices:
-
Use 304, 305, or 316 stainless steel screws for wood with high chemical retention, such as marine or coastal applications.
-
Hot-dip galvanized fasteners work well with certain treated woods in dry conditions.
-
For wood with high surface chemical content, consider stainless steel, silicon bronze, or copper fasteners.
-
Always match the screw coating to the wood treatment and environment to ensure safety and durability.
-
Avoid painting stainless steel fasteners, as this can trap moisture and cause corrosion.
Selecting the right corrosion-resistant coating for your wood screws ensures your projects remain strong and attractive, even in challenging environments.
Finishing and Hiding Screw Heads
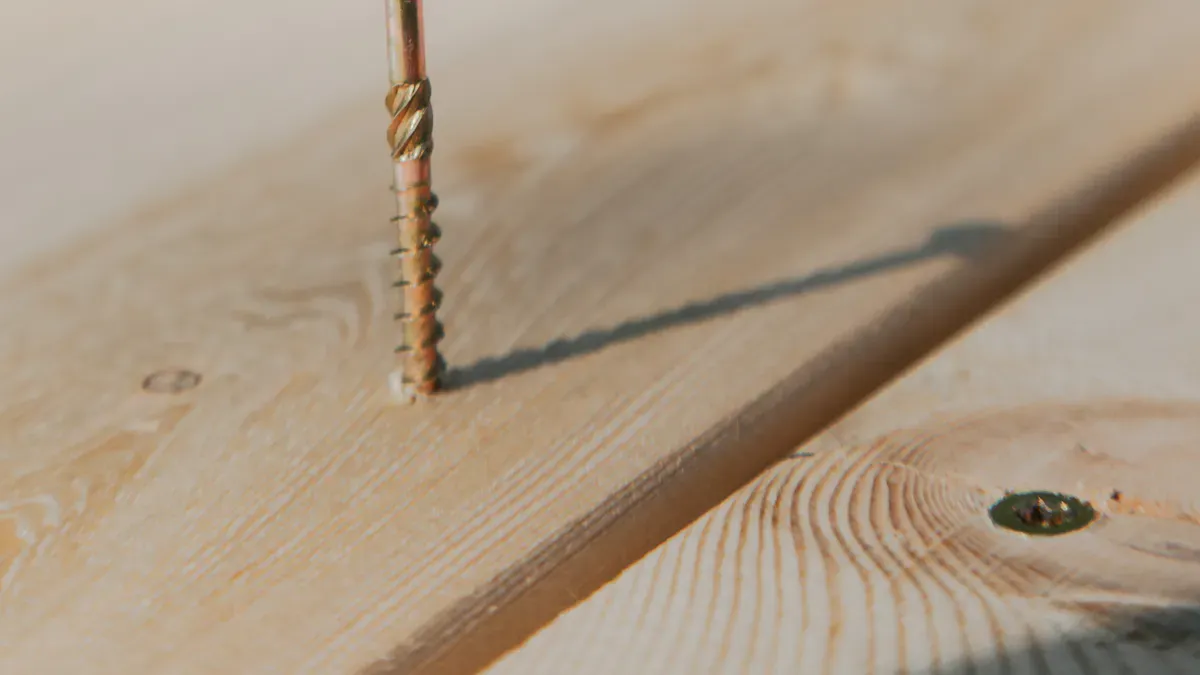
Countersinking and Filling
Properly finishing screw heads starts with countersinking. This process allows the screw head to sit below the wood surface, making it easier to conceal. The most effective methods include:
-
Drill pilot holes that match the screw shank’s diameter. This step prevents wood splitting and ensures accurate placement.
-
Use countersink bits to create a recess for the screw head. The screw sits flush with the surface, ready for finishing.
-
If countersink bits are unavailable, select a larger drill bit to make a shallow indentation.
-
Check the drill bit size and avoid over-drilling. Maintaining the wood’s integrity is essential.
-
Fill the countersunk hole with wood putty that matches the wood color. Sand the area smooth for a seamless finish.
Using Plugs or Caps
Wood plugs and decorative caps offer alternative solutions for hiding screw heads. The table below compares their durability and appearance:
|
Method |
Advantages |
Considerations |
|---|---|---|
|
Wood Plugs |
Natural look; matches wood grain; can use scrap wood |
Requires plug cutter; careful sanding for seamless fit |
|
Decorative Caps |
Quick installation; adds decorative touch |
May not match grain; limited styles in stores |
Wood plugs blend with the project’s grain, while caps provide a fast, decorative option.
Painting or Staining Over Screws
Painting or staining over screws helps achieve a uniform finish. The recommended techniques include:
-
Drive the screw slightly below the surface and clean the area.
-
Fill the hole with wood filler using a putty knife.
-
Remove excess filler to level it with the wood.
-
Allow the filler to dry, then sand it smooth.
-
Apply paint or stain for a seamless, professional appearance.
Choosing wood screws for wood projects involves several key steps:
-
Select screws made from strong materials for durability.
-
Pick head designs that sink flush for a clean finish.
-
Use drive styles that minimize cam-out.
-
Apply coatings for corrosion resistance.
These practices deliver strong holding power and durable joints. Apply these tips to achieve professional results in your next woodworking project.